

Sharepoint 2013 Sandboxed Solution example

Sharepoint 2013 Tutorials Sandboxed Solution example
This Sharepoint 2013 example is about sandboxed solutions.Sandboxed Solutions are SharePoint Solution Package files
(WSP files)Sand box soultions are limited in functionality and use limited
server resourses.
- The limited functionality of sandboxed solutions depend on process isolation and limited code access security of the sharepoint site.
- The resources used by sandboxed solutions are limited by process monitoring, logging and log aggregation.
- This tutorial shows you how you can go through the install of a sandboxed solution and how you can run something in the sandbox.
- The Visual Studio 2010 Tools for SharePoint 2010 provides a project template for the development of a sandboxed solution.
- A developer can develop sandboxed solutions using this templates.
Step 1 : Open Visual Studio 2010.
Create a new project for an event receiver. When the
creation wizard pops up, you have to specify the URL to your SharePoint site,
but you also have to indicate whether you want to create a sandboxed solution
or not.

Open the SampleSandboxedWebPart
project in Visual Studio 2010.
Select
the project in the Solution Explorer and look at the Properties window. The Sandboxed
Solution property is set to true in case of a sandboxed solution.The project has a property Sandboxed Solution that can be set to true. Based on this property
the environment controls the Intellisense to let you know what’s available to
you in a sandboxed solution.

Change this property to False.Open
the SampleSandboxedWebPart.cs
file.Place the cursor at the end of the CreateChildControls()
method and start entering SPSecurity.Run. Notice the Intellisense which means
that you are allowed to do this.

Remove the line of code again.In the project properties turn
the Sandboxed Solution property back
on.Return to the code and type SPSecurity.
You
will see that this is not available anymore.

But when you continue typing in SPSecurity, Intellisense will let you add RunWithElevatedPrivileges.

When a sandboxed solution is deployed, it is not deployed to
the farm solution store but to the Solution gallery on site collection level. The
web part doesn’t contain much functionality. It only displays a label
containing the current date and time.Right-click the project in Solution Explorer and choose Deploy. Open an internet browser and
navigate to the Site Settings page
of your SharePoint site.

You can see that the SampleSandboxedWebPart
solution is available in the Solution
gallery.

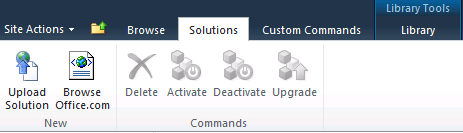
From within here you can also upload sandboxed solutions via
the Upload button in the Solutions tab. Notice that you can also
activate and deactivate features within the solution here.Choose the Solutions
hyperlink in the Galleries section.
- A dialog opens where you can browse to the solution package.
- The dialog also displays a ribbon with an Activate button.Click it if you also want to activate the feature(s) inside the solution.
- Once the features activated, you can add the web part in a sandboxed solution to a SharePoint page.Return to the home page of your SharePoint site and turn it in Edit mode.You can find the web part in the Sandbox Sample category.Place it on the page
- Not everything is allowed when working with sandboxed solutions.
- You cannot deploy application pages for example.
- And when working with web parts, which is allowed in sandboxed solutions, there are certain things that you cannot do like running with elevated privileges.
- You will be able to upload such sandboxed solutions and you will be able to activate its features but the code will be blocked by the UserCode service, otherwise known as the sandbox.
- It’s the UserCode service that controls what is allowed and what not when running in a sandbox.
- Return to Visual Studio 2010 and open the BadSandboxWebPart from the starter files.
- This web part does something that is not allowed when working with sandboxed solutions.
- Open the BadSandboxWebPart.cs file to view the code. In sandboxed solutions you are not allowed to run with elevated privileges

- Upload the solution package to the Solution gallery. When it is uploaded, you can click the Activate button.
- SharePoint will not stop you from activating the features inside the sandboxed solution.
- When you try to add the web part to a SharePoint page in your site, you will find the web part in the Web Part gallery.
- When the web part is added to the page, an error message will be displayed that it couldn’t load the CodeToRunElevated type.
- When you have a number of sandboxed solutions running in your site collection, you will see that resource points are accumulated.
- Once the quota limit is reached, all sandbox solutions will stop running until the next day.

Go back to the Solutions
gallery and take a look at the resource quota.
Next to each sandboxed solution you will also see the
resource usage so that you can check which is a badly designed solution.


0 comments:
Post a Comment