Showing posts with label HTML Helper. Show all posts

BeginForm Helper in MVC 3 Razor

  • We create form to post user's input to the server, ore render the same data from the server on the UI.
  • BeginForm HTML Helper is use to create form on the UI. The HTML helper renders the form tag as markup.
  • The BeginForm helper method has various overloads. 
  • In this article we will see how we can use this helper to render form element.
Example:

Controller:
        //Renders the View with form
        public ActionResult HtmlForm()
        {
            return View();
        }

        //Form is posted to this method.
        [HttpPost]
        public ActionResult HtmlForm(CustomerViewModel model)
        {
            return View();
        }
    

We have used two Action methods for this example. The first method renders the view. The second method is the one where form is posted. The second method has HTTPPost attribute denoting it is the form post and accepts an object of CustomerViewModel class.

ViewModel:

        using System;
        using System.Collections.Generic;
        using System.Linq;
        using System.Web;

        namespace HtmlHelpers.ViewModel
        {
            public class CustomerViewModel
            {
                public int CustomerID { get; set; }

                public string Name { get; set; }

                public string City { get; set; }

                public string Email { get; set; }
            }
        }
    

The above class our ViewModel. The properties defined in this view model are rendered inside the form tag.

View:

        @model HtmlHelpers.ViewModel.CustomerViewModel

        @{
            ViewBag.Title = "HtmlForm";
        }

        <h2>HtmlForm</h2>


        @using (Html.BeginForm("HtmlForm", "Home"))
        {
            @Html.EditorForModel("CustomerViewModel")
            <input type="submit" id="SubmitButton" value="Submit" />
        }
    

We have used BeginForm helper in the above view. The BeginForm helper outputs both the opening <form> and the closing </form>. The helper emits the opening tag during the call to BeginForm, and the call returns an object implementing IDisposable. When execution reaches the closing curly brace of the using satement in the view, the helper emits the closing tag with implicit call to Dispose. The using trick makes the code simpler and elegant.
                                              The submit button posts the form to the HtmlForm action method of Home controller.

Screenshot:


By default BeginForm helper renders the form with POST form method. The BeginForm helper has overload which accepts a FormMethod type parameter using which we can specify POST or GET as type of form method.

Form with GET:

    @using (Html.BeginForm("HtmlForm", "Home", FormMethod.Get))
    {
        @Html.EditorForModel("CustomerViewModel")
        <input type="submit" id="SubmitButton" value="Submit" />
    }

The third parameter specifies whether the FormMethod is POST or GET. By default form is rendered with POST form method. The HtmlForm action method is called when the form is rendered with GET FormMethod.

We can also pass parameter to the Action method using GET. 


    @using (Html.BeginForm("HtmlForm", "Home", FormMethod.Get))
    {
        @Html.EditorForModel("CustomerViewModel")
        <input type="submit" id="SubmitButton" value="Submit" />
    }
    
Controller:
        [HttpGet]
        public ActionResult HtmlForm(int? CustomerID)
        {
            CustomerViewModel model = new CustomerViewModel();
            if (CustomerID > 0)
            {
                model.CustomerID = 1;
                model.Name = "Jack Wilshere";
                model.Email = "Jack@gmail.com";
                model.City = "Arsenal";
            }
            return View(model);
        }
    
ViewModel:
        using System;
        using System.Collections.Generic;
        using System.Linq;
        using System.Web;
        using System.ComponentModel.DataAnnotations;

        namespace HtmlHelpers.ViewModel
        {
            public class CustomerViewModel
            {
                public int CustomerID { get; set; }

                public string Name { get; set; }

                public string City { get; set; }

                public string Email { get; set; }
            }
        }
    
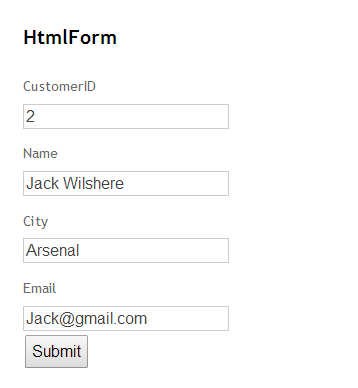
After the form is rendered on UI, we need to provide the CustomerID on the form and click on search button. The form is submitted to HTMLForm action method which accepts the CustomerID parameter. The value entered in the CustomerID field is present in the CustomerID parameter. You need to make sure that the ViewModel property name and the parameter name matches in order to receive the user input.

UI:

We will enter the CustomerID and will click on Submit button. The form is submitted to Action method with the entered CustomerID. We can use the parameter to fetch desired data from database. The data is displayed on UI as shown below.


There is another overload of this helper which accepts the htmlAttributes.

Overload with htmlAttributes:

    @using (Html.BeginForm("HtmlForm", "Home", FormMethod.Get, new { target = "_blank" }))
    {
        @Html.EditorForModel("CustomerViewModel")
        <input type="submit" id="SubmitButton" value="Submit" />
    }
    

In the above code, you are passing an anonymously typed object to the htmlAttribute parameter of BeginForm. You will also find an htmlAttributes parameter of type IDictionary<string, object> in a different overload. 
              In the above example, we have set target="_blank" using the htmlAttributes. We can set as many attribute values using the htmlAttributes parameter as necessary.

Inside BeginForm:


The BeginForm helper asks the routing engine how to reach the HtmlForm action of HomeController. Behind the scenes it uses the method name GetVirtualPath on the Routes property exposed by RouteTable.

Ajax ActionLink HTML Helper in MVC3 Razor

  • AJAX helpers are available through the Ajax property inside Razor view.
  • Like HTML helpers, most of the methods on this property are extension methods.
  • The ActionLink method of the Ajax property creates an anchor tag with asynchronous behaviour.
  • When the link is clicked, the action method is invoked asynchronously by the Javascript.
  • Ajax ActionLink helper is useful in scenarios where you want to display some information or details on the page without any postback or rediecting to new page.

Asp.net MVC3 Razor has 12 overload of AJAX ActionLink helper. We will see some of the important ones.
In order to use the Ajax features we need to reference jquery.unobtrusive-ajax.min.js file in the Layout or in the view itself.

Example 1:

View
        @{
    ViewBag.Title = "Index";
    Layout = "~/Views/Shared/_Layout.cshtml";
}

<h2>Index</h2>
<div id="myDiv">This is Div element.</div>


@Ajax.ActionLink("Click",
    "AjaxActionLinkDemo",
    new AjaxOptions
    {
        UpdateTargetId = "myDiv",
        InsertionMode = InsertionMode.InsertAfter,
        HttpMethod = "GET"
    })
    

In the above view we have used AJAX ActionLink helper. The first parameter is the link text to be displayed on UI. The second parameter is the name of the Action method to call. The third parameter is the AjaxOptions parameter. The Ajax options parameter specifies how to send the request, and what will happen with the result the server returns. When clicked the AjaxActionLinkDemo action method will be called and result returned by it will be updated to the element ID specified for UpdateTargetId property.

Controller

        using System;
        using System.Collections.Generic;
        using System.Linq;
        using System.Web;
        using System.Web.Mvc;

        namespace AjaxHelpers.Controllers
        {
            public class AjaxHelpersController : Controller
            {
                //
                // GET: /AjaxHelpers/

                public ActionResult Index()
                {
                    return View();
                }


                public ActionResult AjaxActionLinkDemo()
                {
                    return View();
                }

            }
        }
    

The Index is the Action method that renders the view and the link. The AjaxActionLinkDemo is the action method which is called on click of the link.

Snapshot : Before click


Snapshot : After click

The HTML of the View returned by the Action method is rendered on the view from where the Ajax link is clicked asynchronously.


Example 2 : ActionLink with Route values 

View

        @Ajax.ActionLink("Click",//link text
    "AjaxActionLinkDemo",//Action method to call
    new {id="1"},//route value
    new AjaxOptions//Ajax options
    {
        UpdateTargetId = "myDiv",
        InsertionMode = InsertionMode.InsertAfter,
        HttpMethod = "GET"
    })
    

In the above example. we are also passing one parameter to the Action method.

Controller
        public ActionResult AjaxActionLinkDemo(int id)
        {
            return View();
        }
    
The Action method accepts one parameter which will send from view by ActionLink helper as route value.

Example 3: Passing RouteValueDictionary


View

        @{
            ViewBag.Title = "Index";
            Layout = "~/Views/Shared/_Layout.cshtml";
            RouteValueDictionary dic = new RouteValueDictionary();
            dic.Add("id", 1);
            dic.Add("value", "hello world");
    
}

<h2>Index</h2>
<div id="myDiv">This is Div element.</div>


@Ajax.ActionLink("Click",
    "AjaxActionLinkDemo",
    dic,
    new AjaxOptions
    {
        UpdateTargetId = "myDiv",
        InsertionMode = InsertionMode.InsertAfter,
        HttpMethod = "GET"
    })
    

In the above example, we have created a collection of type RouteValueDictionary. In short, we will be passing id and value as parameter to the Action method.

Controller

        public ActionResult AjaxActionLinkDemo(int id,string value)
        {
            return View();
        }
    
The Action method accepts two parameters as per the dictionary defined on the view. You need to make sure that the names of the parameter matches the keys added to the dictionary.

Example 4: Passing the HTMLAttributes

View


        @Ajax.ActionLink("Click",
    "AjaxActionLinkDemo",
    new {id="1"},
    new AjaxOptions
    {
        UpdateTargetId = "myDiv",
        InsertionMode = InsertionMode.InsertAfter,
        HttpMethod = "GET"
    }, new { style = "font-family:comic sans ms;font-size:20px;" })
    

In the above example, we are passing htmlAttributes as well. We are setting the style property of the anchor.

Snapshot

The link style is changes as specified in the htmlAttributes object.

Summary


AJAX ActionLink method renders an anchor element. When the user clicks the link, MVC asynchronously invokes the specified action method via an HTTP POST request. 

The response of that action method can be used to update a specified DOM element, depending on which AjaxOptions are specified.

Custom CheckBox HTML Helper in MVC3 Razor

  1. In MVC3 Razor we have HTML helpers to render different controls. 
  2. Instead of using these helpers we can create our own helper classes and methods and use them as we want.
  3. The creation of custom helpers provides flexibility to change the attributes and style of the control that renders.
  4. In this article we will create Custom HTML helper for input type="checkbox" to render checkbox control.

Following are the steps :

First we will create a folder named CustomHelper. We will include a class file named CustomCheckBoxHelper.cs, which will hold code for Custom checkbox control.

We have created the folder and the class file as mentioned earlier as shown in the above image.

The class file looks as below :

using System;
using System.Collections.Generic;
using System.Linq;
using System.Web;
using System.Web.Mvc;
using System.Web.Routing;

namespace CustomHtmlHelpers.CustomHelpers
{
    public static class CustomCheckBoxHelper
    {
        //This helper accepts name attribute. This method in turns calls our second overload.
        public static MvcHtmlString Custom_Checkbox(this HtmlHelper helper, string name)
        {
            return Custom_Checkbox(helper, name, false);
        }

        //This helper accepts name and isChecked boolean attribute. 
        public static MvcHtmlString Custom_Checkbox(this HtmlHelper helper, string name,bool isChecked)
        {
            return Custom_Checkbox(helper, name, isChecked, null);
        }

        //This overload accepts name, isChecked and htmlAttributes as parameter.
        public static MvcHtmlString Custom_Checkbox(this HtmlHelper helper, string name,bool isChecked,object htmlAttributes)
        {
            //Creating input control using TagBuilder class.
            TagBuilder checkbox = new TagBuilder("input");

            //Setting its type attribute to checkbox to render checkbox control.
            checkbox.Attributes.Add("type", "checkbox");

            //Setting the name and id attribute.
            checkbox.Attributes.Add("name", name);
            checkbox.Attributes.Add("id", name);

            //Adding the checked attibute based on parameter received.
            if (isChecked)
                checkbox.Attributes.Add("checked", "checked");

            //Merging the other attributes passed in the attribute.
            checkbox.MergeAttributes(new RouteValueDictionary(htmlAttributes));

            return MvcHtmlString.Create(checkbox.ToString(TagRenderMode.Normal)); 
        }
    }
}

In the above example, we have created a static class. We have created three overloads accepting different number of parameters to support multiple requirements.

Overload 1 : The first overload accepts name parameter. This name parameter is used to set the name attribute. This method is extension method and accepts object of HtmlHelper class. The first parameter adds this overload to System.Web.MVC namespace. On view we can access this method using @html. This overload in turn calls another overload.


Overload 2 : The second overload accepts name and isChecked as parameters. The name is used to set name attribute and isChecked parameter decides whether the checkbox should be checked or not. This overload calls another overload.


Overload 3 : The third overload accepts name, value and htmlAttributes object. The htmlAttributes object contains route values passed from the view. In this method we are creating a input element using TagBuilder class. We are setting its type attribute to checkbox to render checkbox. We are also setting name, id and any other attributes passed using htmlAttributes.


View :


<div>
@Html.Custom_Checkbox("hello")
@Html.Custom_Checkbox("hello", true)
@Html.Custom_Checkbox("hello", false, new {@class = "checkBox" })
</div>

In the view we are using @html to access our Custom_CheckBox method. As we have three overloads for it we have defined three controls. 

UI :


Rendered HTML :

<div>
<input id="hello" name="hello" type="checkbox"></input>
<input checked="checked" id="hello" name="hello" type="checkbox"></input>
<input class="checkBox" id="hello" name="hello" type="checkbox"></input>
</div>

This is how we can create our own Custom HTML Helper to render hidden control. You can customize the above class to add more features in it. We can customize the overloads to accept list to render multiple checkboxes.

Custom Hidden HTML Helper with Model Binding in MVC3 Razor

  1. In MVC3 Razor we have HTML helpers to render different controls. 
  2. Instead of using these helpers we can create our own helper classes and methods and use them as we want.
  3. The creation of custom helpers provides flexibility to change the attributes and style of the control that renders.
  4. In this article we will create Custom HTML helper for input type hidden with Model Binding to render textbox of type hidden.

Following are the steps :

We have created a separate folder named CustomHelpers to hold Custom HTML Helpers. We have created a class named CustomHiddenHelperModelBinding.cs which will contain code to render hidden input field.

The class file looks like below :

using System;
using System.Collections.Generic;
using System.Linq;
using System.Web;
using System.Web.Mvc;
using System.Web.Routing;
using System.Linq.Expressions;

namespace CustomHtmlHelpers.CustomHelpers
{
    public static class CustomHiddenHelperModelBinding
    {
        //This overload accepts single expression as parameter.
        public static MvcHtmlString Custom_HiddenFor<TModel, TValue>(this HtmlHelper<TModel> helper, Expression<Func<TModel, TValue>> expression)
        {
            return Custom_HiddenFor(helper, expression, null);
        }

        //This overload accepts expression and htmlAttributes object as parameter.
        public static MvcHtmlString Custom_HiddenFor<TModel, TValue>(this HtmlHelper<TModel> helper, Expression<Func<TModel, TValue>> expression, object htmlAttributes)
        {
            //Fetching the metadata related to expression. This includes name of the property, model value of the property as well.
            ModelMetadata metadata = ModelMetadata.FromLambdaExpression(expression, helper.ViewData);
            string htmlFieldName = ExpressionHelper.GetExpressionText(expression);
            //Fetching the property name.
            string propertyName = metadata.DisplayName ?? metadata.PropertyName ?? htmlFieldName.Split('.').Last();

            //Creating a textarea tag using TagBuilder class.
            TagBuilder hidden = new TagBuilder("input");

            //Setting the type attribute to hidden to render hidden input field.
            hidden.Attributes.Add("type", "hidden");

            //Setting the name and id attribute.
            hidden.Attributes.Add("name", propertyName);
            hidden.Attributes.Add("id", propertyName);

            //Setting the value attribute of textbox with model value if present.
            if (metadata.Model != null)
            {
                hidden.Attributes.Add("value", metadata.Model.ToString());
            }
            //merging any htmlAttributes passed.
            hidden.MergeAttributes(new RouteValueDictionary(htmlAttributes));
            return MvcHtmlString.Create(hidden.ToString(TagRenderMode.Normal));
        }
    }
}

Overload 1 : The first overload accepts linq expression as parameter. This method is extension method and accepts object of HtmlHelper class. The first parameter adds this overload to System.Web.MVC namespace. On view we can access this method using @html. This overload in turn calls another overload.

Overload 2 : The second overload accepts linq expression and htmlAttributes object as parameters. We have use ModelMetaData class to get all details or meta data about the expression. We get the property name and model value using ModelMetaData class.

The propertyName is used to set the name attribute of the control. We have used TagBuilder class to create input element. We have set type property to hidden to render hidden input field.
          We have also assigned other attributes passed using htmlAttributes object. The Model value is fetched if present and assigned to hidden input's value attribute. The entire control is returned as MVCHtmlString format.

ViewModel :

using System;
using System.Collections.Generic;
using System.Linq;
using System.Web.Mvc;
using System.ComponentModel.DataAnnotations;


namespace CustomHtmlHelpers.Models
{
    public class Register
    {
        public string hidden { get; set; }
    }
}

We have created a hidden property in our View Model. We will bind this View Model to our view. On View we will bind this property to our control.

Controller :


public ActionResult About()
        {
            Register register = new Register();
            register.hidden = "Fabregas";
            return View(register);
        }

In the controller, we are creating object of our ViewModel class and assigning value to the hidden property. We will pass this model to the View. View will render the control. The value passed will be shown with the control.

View :


<h2>About</h2>
<div>
@Html.Custom_HiddenFor(Model => Model.hidden)
@Html.Custom_HiddenFor(Model => Model.hidden, new { @class = "hiddenClass" })
</div>

Rendered HTML :


<h2>About</h2>
<div>
<input id="hidden" name="hidden" type="hidden" value="Fabregas"></input>
<input class="hiddenClass" id="hidden" name="hidden" type="hidden" value="Fabregas"></input>
</div>

Thus following the above steps we can create our own custom helper for input type="password". We can customize more as per our requirement.

Custom Hidden HTML Helper in MVC3 Razor

  1. In MVC3 Razor we have HTML helpers to render different controls. 
  2. Instead of using these helpers we can create our own helper classes and methods and use them as we want.
  3. The creation of custom helpers provides flexibility to change the attributes and style of the control that renders.
  4. In this article we will create Custom HTML helper for input type="hidden" to render hidden control.
Following are the steps :

First we will create a folder named CustomHelper. We will include a class file named CustomHiddenHelper.cs, which will hold code for Custom hidden control.


We have created the folder and the class file as mentioned earlier as shown in the above image.

The class file looks as below :

using System;
using System.Collections.Generic;
using System.Linq;
using System.Web;
//namespace to use HtmlHelper class
using System.Web.Mvc;
//namespace to use RouteValueDictionary class
using System.Web.Routing;

namespace CustomHtmlHelpers.CustomHelpers
{
    public static class CustomHiddenHelper
    {
        //Created a static method which accepts name as parameter. This method is extension method.
        //We can access this method using @html. 
        //This method inturn calls another method which is our second overload.
        public static MvcHtmlString Custom_Hidden(this HtmlHelper helper, string name)
        {
            return Custom_Hidden(helper, name, null);

        }

        //Created a static method which accepts name and value as parameter. This method is extension method.
        //We can access this method using @html. 
        //This method inturn calls another method which is our third overload.
        public static MvcHtmlString Custom_Hidden(this HtmlHelper helper, string name, object value)
        {
            return Custom_Hidden(helper, name, value, null);
        }

        //Created a static method which accepts name, value and htmlAttributes as parameter. This method is extension method.
        //We can access this method using @html.
        public static MvcHtmlString Custom_Hidden(this HtmlHelper helper, string name, object value, object htmlAttributes)
        {
            //Used TagBuilder class to create input element.
            TagBuilder hidden = new TagBuilder("input");

            //Set its type property to hidden to render input type="hidden" control.
            hidden.Attributes.Add("type", "hidden");

            //Setting name and id attribute.
            hidden.Attributes.Add("name", name);
            hidden.Attributes.Add("id", name);

            if (value != null)
            {
                //Setting value for hidden input. This value we get in the for post.
                hidden.Attributes.Add("value", value.ToString());
            }

            //Merging the attribute object. This object contains html attributes defined in view.
            hidden.MergeAttributes(new RouteValueDictionary(htmlAttributes));

            //returning the HTML encoded string of hidden control.
            return MvcHtmlString.Create(hidden.ToString(TagRenderMode.Normal));
        }
    }
}

In the above example, we have created a static class. We have created three overloads accepting different number of parameters to support multiple requirements.

Overload 1 : The first overload accepts name parameter. This name parameter is used to set the name attribute. This method is extension method and accepts object of HtmlHelper class. The first parameter adds this overload to System.Web.MVC namespace. On view we can access this method using @html. This overload in turn calls another overload.


Overload 2 : The second overload accepts name and value as parameters. The name is used to set name attribute and value is used to set the value of hidden control i.e. value attribute. This overload calls another overload.


Overload 3 : The third overload accepts name, value and htmlAttributes object. The htmlAttributes object contains route values passed from the view. In this method we are creating a input element using TagBuilder class. We are setting its type attribute to hidden to render hidden. We are also setting name, inner text and any other attributes passed using htmlAttributes.


View :


<div>
@Html.Custom_Hidden("Hidden1")
@Html.Custom_Hidden("Hidden2","Hello world")
@Html.Custom_Hidden("Hidden3", "Hello World", new { @class = "hiddenClass" })
</div>

In the view we are using @html to access our Custom_Hidden method. As we have three overloads for it we have defined three controls. 

Rendered HTML :


<div>
<input id="Hidden1" name="Hidden1" type="hidden"></input>
<input id="Hidden2" name="Hidden2" type="hidden" value="Hello world"></input>
<input class="hiddenClass" id="Hidden3" name="Hidden3" type="hidden" value="Hello World"></input>
</div>

This is how we can create our own Custom HTML Helper to render hidden control. You can customize the above class to add more features in it.

Custom Password Html Helper with Model Binding in MVC3 Razor


  1. In MVC3 Razor we have HTML helpers to render different controls. 
  2. Instead of using these helpers we can create our own helper classes and methods and use them as we want.
  3. The creation of custom helpers provides flexibility to change the attributes and style of the control that renders.
  4. In this article we will create Custom HTML helper for input type Password with Model Binding to render textbox of type password.

Following are the steps :

We have created a separate folder named CustomHelpers to hold Custom HTML Helpers. We have created a class named CustomPasswordHelperModelBinding.cs which will contain code to render password control.

The class file looks like below :

using System;
using System.Collections.Generic;
using System.Linq;
using System.Web;
using System.Web.Mvc;
using System.Web.Routing;
using System.Linq.Expressions;

namespace CustomHtmlHelpers.CustomHelpers
{
    public static class CustomPasswordHelperModelBinding
    {
        //This overload accepts single expression as parameter.
        public static MvcHtmlString Custom_PasswordFor<TModel, TValue>(this HtmlHelper<TModel> helper, Expression<Func<TModel, TValue>> expression)
        {
            return Custom_PasswordFor(helper, expression, null);
        }

        //This overload accepts expression and htmlAttributes object as parameter.
        public static MvcHtmlString Custom_PasswordFor<TModel, TValue>(this HtmlHelper<TModel> helper, Expression<Func<TModel, TValue>> expression, object htmlAttributes)
        {
            //Fetching the metadata related to expression. This includes name of the property, model value of the property as well.
            ModelMetadata metadata = ModelMetadata.FromLambdaExpression(expression, helper.ViewData);
            string htmlFieldName = ExpressionHelper.GetExpressionText(expression);
            //Fetching the property name.
            string propertyName = metadata.DisplayName ?? metadata.PropertyName ?? htmlFieldName.Split('.').Last();

            //Creating a textarea tag using TagBuilder class.
            TagBuilder password = new TagBuilder("input");
            password.Attributes.Add("type", "password");
            //Setting the name and id attribute.
            password.Attributes.Add("name", propertyName);
            password.Attributes.Add("id", propertyName);

            //Setting the value attribute of textbox with model value if present.
            if (metadata.Model != null)
            {
                password.Attributes.Add("value", metadata.Model.ToString());
            }
            //merging any htmlAttributes passed.
            password.MergeAttributes(new RouteValueDictionary(htmlAttributes));
            return MvcHtmlString.Create(password.ToString(TagRenderMode.Normal));
        }
    }
}

Overload 1 : The first overload accepts linq expression as parameter. This method is extension method and accepts object of HtmlHelper class. The first parameter adds this overload to System.Web.MVC namespace. On view we can access this method using @html. This overload in turn calls another overload.

Overload 2 : The second overload accepts linq expression and htmlAttributes object as parameters. We have use ModelMetaData class to get all details or meta data about the expression. We get the property name and model value using ModelMetaData class.

The propertyName is used to set the name attribute of the control. We have used TagBuilder class to create input element. We have set type property to password to render password.
          We have also assigned other attributes passed using htmlAttributes object. The Model value is fetched if present and assigned to textarea's innerHtml property. The entire control is returned as MVCHtmlString format.

ViewModel :

using System;
using System.Collections.Generic;
using System.Linq;
using System.Web.Mvc;
using System.ComponentModel.DataAnnotations;


namespace CustomHtmlHelpers.Models
{
    public class Register
    {
        public string password { get; set; }
    }
}

We have created a password property in our View Model. We will bind this View Model to our view. On View we will bind this property to our control.

Controller :


public ActionResult About()
        {
            Register register = new Register();
            register.password = "Fabregas";
            return View(register);
        }

In the controller, we are creating object of our ViewModel class and assigning value to the password property. We will pass this model to the View. View will render the control. The value passed will be shown with the control.

View :


@model CustomHtmlHelpers.Models.Register

@{
    ViewBag.Title = "About Us";
}

<h2>About</h2>
<div>
@Html.Custom_PasswordFor(Model => Model.password)
@Html.Custom_PasswordFor(Model => Model.password, new { maxlength = 10})
</div>

In the View, we have binded the ViewModel. We have used our Custom helper to render the control for password property. We have binded the control to password property using linq expression.

UI :


The password control is rendered as expected. The additional attributes passed using htmlAttributes for second control are applied.


Rendered HTML :


<h2>About</h2>
<div>
<input id="password" name="password" type="password" value="Fabregas"></input>
<input id="password" maxlength="10" name="password" style="color:Red;" type="password" value="Fabregas"></input>
</div>

Thus following the above steps we can create our own custom helper for input type="password". We can customize more as per our requirement.

Custom Password HTML Helper in MVC3 Razor

  1. In MVC3 Razor we have HTML helpers to render different controls. 
  2. Instead of using these helpers we can create our own helper classes and methods and use them as we want.
  3. The creation of custom helpers provides flexibility to change the attributes and style of the control that renders.
  4. In this article we will create Custom HTML helper for input type="password" to render password control.

Following are the steps :

First we will create a folder named CustomHelper. We will include a class file named CustomPasswordHelper.cs, which will hold code for Custom password control.


We have created the folder and the class file as mentioned earlier as shown in the above image.
The class file looks as below :


using System;
using System.Collections.Generic;
using System.Linq;
using System.Web;
//namespace to use HtmlHelper class
using System.Web.Mvc;
//namespace to use RouteValueDictionary class
using System.Web.Routing;

namespace CustomHtmlHelpers.CustomHelpers
{
    public static class CustomPasswordHelper
    {
        //Created a static method which accepts name as parameter. This method is extension method.
        //We can access this method using @html. 
        //This method inturn calls another method which is our second overload.
        public static MvcHtmlString Custom_Password(this HtmlHelper helper, string name)
        {
            return Custom_Password(helper, name, null);
        }

        //Created a static method which accepts name and value as parameter. This method is extension method.
        //We can access this method using @html. 
        //This method inturn calls another method which is our third overload.
        public static MvcHtmlString Custom_Password(this HtmlHelper helper, string name,string value)
        {
            return Custom_Password(helper, name, value, null);
        }

        //Created a static method which accepts name, value and htmlAttributes as parameter. This method is extension method.
        //We can access this method using @html.
        public static MvcHtmlString Custom_Password(this HtmlHelper helper, string name,string value,object htmlAttributes)
        {
            //Used TagBuilder class to create input element.
            TagBuilder password = new TagBuilder("input");

            //Set its type property to password to render password control.
            password.Attributes.Add("type", "password");

            //Setting name and id attribute.
            password.Attributes.Add("id", name);
            password.Attributes.Add("name", name);


            if (!string.IsNullOrEmpty(value))
            {
                //Setting text for the password field with value parameter.
                password.Attributes.Add("value", value);
            }

            //Merging the attribute object. This object contains html attributes defined in view.
            password.MergeAttributes(new RouteValueDictionary(htmlAttributes));

            //returning the HTML encoded string of password control.
            return MvcHtmlString.Create(password.ToString(TagRenderMode.Normal));
        }
    }
}

In the above example, we have created a static class. We have created three overloads accepting different number of parameters to support multiple requirements.

Overload 1 : The first overload accepts name parameter. This name parameter is used to set the name attribute. This method is extension method and accepts object of HtmlHelper class. The first parameter adds this overload to System.Web.MVC namespace. On view we can access this method using @html. This overload in turn calls another overload.

Overload 2 : The second overload accepts name and value as parameters. The name is used to set name attribute and value is used to set the text of password control i.e. value attribute. This overload calls another overload.

Overload 3 : The third overload accepts name, value and htmlAttributes object. The htmlAttributes object contains route values passed from the view. In this method we are creating a input element using TagBuilder class.We are setting its type attribute to password to render password. We are also setting name, inner text and any other attributes passed using htmlAttributes.


View :


<div>
@Html.Custom_Password("password")
@Html.Custom_Password("password","password")
@Html.Custom_Password("password", "password", new { maxlength = 10})
</div>

In the view we are using @html to access our Custom_Password method. As we have three overloads for it we have defined three controls. 

UI :


As we have defined three password controls, we can see three password controls getting rendered on UI.

Rendered HTML :


<div>
<input id="password" name="password" type="password"></input>
<input id="password" name="password" type="password" value="password"></input>
<input id="password" maxlength="10" name="password" type="password" value="password"></input>
</div>

This is how we can create our own Custom HTML Helper to render password control. You can customize the above class to add more features in it.

Custom TextArea HTML Helper with Model Binding in MVC3 razor

  1. In MVC3 Razor we have HTML helpers to render different controls. 
  2. Instead of using these helpers we can create our own helper classes and methods and use them as we want.
  3. The creation of custom helpers provides flexibility to change the attributes and style of the control that renders.
  4. In this article we will create Custom HTML helper for TextArea with Model Binding to render TextArea.

Following are the steps :

We have created a separate folder named CustomHelpers to hold Custom HTML Helpers. We have created a class named CustomTextAreaModelBinding.cs which will contain code to render TextArea.


The class file looks like below :

using System;
using System.Collections.Generic;
using System.Linq;
using System.Web;
using System.Web.Mvc;
using System.Web.Routing;
using System.Linq.Expressions;

namespace CustomHtmlHelpers.CustomHelpers
{
    public static class CustomTextAreaModelBinding
    {
        //This overload accepts single expression as parameter.
        public static MvcHtmlString Custom_TextAreaFor<TModel, TValue>(this HtmlHelper<TModel> helper, Expression<Func<TModel, TValue>> expression)
        {
            return Custom_TextAreaFor(helper, expression, null);
        }

        //This overload accepts expression and htmlAttributes object as parameter.
        public static MvcHtmlString Custom_TextAreaFor<TModel, TValue>(this HtmlHelper<TModel> helper, Expression<Func<TModel, TValue>> expression, object htmlAttributes)
        {
            //Fetching the metadata related to expression. This includes name of the property, model value of the property as well.
            ModelMetadata metadata = ModelMetadata.FromLambdaExpression(expression, helper.ViewData);
            string htmlFieldName = ExpressionHelper.GetExpressionText(expression);
            //Fetching the property name.
            string propertyName = metadata.DisplayName ?? metadata.PropertyName ?? htmlFieldName.Split('.').Last();

            //Creating a textarea tag using TagBuilder class.
            TagBuilder textarea = new TagBuilder("textarea");
            //Setting the name and id attribute.
            textarea.Attributes.Add("name", propertyName);
            textarea.Attributes.Add("id", propertyName);

            //Setting the value attribute of textbox with model value if present.
            if (metadata.Model != null)
            {
                textarea.InnerHtml = metadata.Model.ToString();
            }
            //merging any htmlAttributes passed.
            textarea.MergeAttributes(new RouteValueDictionary(htmlAttributes));
            return MvcHtmlString.Create(textarea.ToString(TagRenderMode.Normal));
        }
    }
}

Overload 1 : The first overload accepts linq expression as parameter. This method is extension method and accepts object of HtmlHelper class. The first parameter adds this overload to System.Web.MVC namespace. On view we can access this method using @html. This overload in turn calls another overload.

Overload 2 : The second overload accepts linq expression and htmlAttributes object as parameters. We have use ModelMetaData class to get all details or meta data about the expression. We get the property name and model value using ModelMetaData class.

The propertyName is used to set the name attribute of the control. We have used TagBuilder class to create TextArea tag.
          We have also assigned other attributes passed using htmlAttributes object. The Model value is fetched if present and assigned to textarea's innerHtml property. The entire control is returned as MVCHtmlString format.


ViewModel :


using System;
using System.Collections.Generic;
using System.Linq;
using System.Web.Mvc;
using System.ComponentModel.DataAnnotations;


namespace CustomHtmlHelpers.Models
{
    public class Register
    {
        public string Address { get; set; }
    }
}

We have created an Address property in ViewModel. We will bind our TextArea with this property.

Controller :


public ActionResult About()
        {
            Register register = new Register();
            register.Address = "Mumbai, India";
            return View(register);
        }

In the About Action method, we have created object of Register class, assigned value to address property and we have returned the View with this ViewModel object.

View :


@model CustomHtmlHelpers.Models.Register

@{
    ViewBag.Title = "About Us";
}

<h2>About</h2>
<div>
@Html.Custom_TextAreaFor(Model => Model.Address)
@Html.Custom_TextAreaFor(Model => Model.Address, new { style="color:Red;resize:none;"})
</div>

UI :


Rendered HTML :

<textarea id="Address" name="Address">Mumbai, India</textarea>
<textarea id="Address" name="Address" style="color:Red;resize:none;">Mumbai, India</textarea>

This is how we can create our own Custom Helper to render TextArea with Model Binding.

Custom TextArea HTML Helper in Asp.net MVC3 Razor

  1. In MVC3 Razor we have HTML helpers to render different controls. 
  2. Instead of using these helpers we can create our own helper classes and methods and use them as we want.
  3. The creation of custom helpers provides flexibility to change the attributes and style of the control that renders.
  4. In this article we will create Custom HTML helper for TextArea to render TextArea control.

Follow the steps :

First we will create a folder named CustomHelper. We will include a class file named CustomTextAreaHelper.cs, which will hold code for Custom TextArea control.


We have created the folder and the class file as mentioned earlier as shown in the above image.
The class file looks as below :


using System;
using System.Collections.Generic;
using System.Linq;
using System.Web;
//namespace to use HtmlHelper class
using System.Web.Mvc;
//namespace to use TagBuilder class
using System.Text;
//namespace to use RouteValueDictionary class
using System.Web.Routing;


namespace CustomHtmlHelpers.CustomHelpers
{
    public static class CustomTextAreaHelper
    {
        //Created a static method which accepts name as parameter. This method is extension method.
        //We can access this method using @html. 
        //This method in turn calls another method which is our second overload.
        public static MvcHtmlString Custom_TextArea(this HtmlHelper helper, string name)
        {
            return Custom_TextArea(helper, name, null);
        }


        //Created a static method which accepts name and value as parameter. This method is extension method.
        //We can access this method using @html. 
        //This method in turn calls another method which is our third overload.
        public static MvcHtmlString Custom_TextArea(this HtmlHelper helper, string name, string value)
        {
            return Custom_TextArea(helper, name, value, null);
        }


        //Created a static method which accepts name, value and htmlAttributes as parameter. This method is extension method.
        //We can access this method using @html.
        public static MvcHtmlString Custom_TextArea(this HtmlHelper helper, string name, string value,object htmlAttributes)
        {
            //Created a textarea tag using TagBuilder class.
            TagBuilder textarea = new TagBuilder("textarea");
            //Setting its name attribute
            textarea.Attributes.Add("name", name);
            if (!string.IsNullOrEmpty(value))
            {
                //assigning the value passed as parameter. This valus is shown inside the TextArea.
                textarea.InnerHtml = value;
            }
            //Merging the attribute object.
            textarea.MergeAttributes(new RouteValueDictionary(htmlAttributes));
            return MvcHtmlString.Create(textarea.ToString());
        }
    }
}

In the above example, we have created a static class. We have created three overloads accepting different number of parameters to support multiple requirements.

Overload 1 : The first overload accepts name parameter. This name parameter is used to set the name attribute. This method is extension method and accepts object of HtmlHelper class. The first parameter adds this overload to System.Web.MVC namespace. On view we can access this method using @html. This overload in turn calls another overload.

Overload 2 : The second overload accepts name and value as parameters. The name is used to set name attribute and value is used to set the inner text of TextArea. This overload calls another overload.

Overload 3 : The third overload accepts name, value and htmlAttributes object. The htmlAttributes object contains route values passed from the view. In this method we are creating a TextArea element using TagBuilder class. We are also setting name, inner text and any other attributes passed using htmlAttributes.


View :


<h2>About</h2>
<div>
@Html.Custom_TextArea("textarea")
@Html.Custom_TextArea("textarea", "This is Custom Textarea")
@Html.Custom_TextArea("textarea", "This is Custom TextArea", new { style = "color:Red;" })
</div>

In View we are using all the three overloads to render textarea with multiple parameters.

UI :


The textarea elements rendered as expected. 


Rendered HTML :

<textarea name="textarea"></textarea>
<textarea name="textarea">This is Custom Textarea</textarea>
<textarea name="textarea" style="color:Red;">This is Custom TextArea</textarea>

This is how we can create our own Custom HTML Helper to render TextArea control.