Showing posts with label JQuery. Show all posts

Arrays in JQuery

  • The Array object is used to store multiple values in a single variable. 
  • An Array can hold different types of data types in a single array slot, which implies that an array can have a string, a number, or an object in a single slot.
Creating an Array:

An Array object can be created in the following ways:
  • Using the array Constructor
  • Using the array literal notation
Using the array Constructor
An empty array is created in cases where you do not know the exact number of elements to be inserted in an array. You can create an empty array by using an array constructor, as shown below:

    var myArray = new Array();

You can also create an array of any given size as shown below:


    var myArray = new Array(size);
    var myArray = new Array(20);

In the preceding code snippet, an array with 20 items is created.

You can also create an array with given elments as shown below:


    var array1 = new Array("Henry", "Fabregas", "Wilshere", "Cazorla", "Ozil");
    var array2 = new Array("IT", "Weekend", "Appraisal", "Escalation", "Resignation");

In the preceding code arrays with given values are created.

Using the array Literal notation

An array can be created by using the array literal notations. Array literal notations are comma-separated list of items enclosed by square brackets.

The syntax to create an empty array by using the array literal notation is shown below:


    var myArray = [];

The following code snippet shows how to create an array with given elements:


    var array1 = ["Ozil", "Cazorla"];
    var array2 = [6, "Cazorla",true];

In the preceding code snippet, an array containing different values, such as number 6, string Cazorla and boolean value true is created.

Methods of Array Object


  • push:
The push method adds new element as the last element and returns the length of the new array.

Simple Example:


In the above example, we have create a simple array, and added two elements to it. We have also created button on click of which the array elements are shown using paragraph element.

Another Example:


In the above example, we have created an array added elements into it as per user choice and also displayed its size.


  • pop: 
The pop method removes the last element of an array and returns that element. It is opposite to the method push.

Simple Example:


In the preceding example, we have created an array with five elements. We then used pop method to remove last element from an array. The pop method also returned the element removed, we have captured it in a variable and showed on UI.

Another Example:


In the preceding example, we have created an array. On click of pop button we are removing last element from the array and displaying the removed and current array.


  • concat:
The concat method joins two or more arrays and returns te joined array. The concat method accepts the another array object to concat. In order to concat more than two arrays, pass multiple arrays to concat method comma separated.


In the preceding example, we have shown how to concat two or more arrays using concat method.


  • join:
The join method joins all elements of an array into a string. This method creates a string representation of an array by joining all its elements using a separator string. If no separator is supplied, i.e. join() without an argument, the array will be joined using comma.


In the preceding example, we have seen how to join array elements by passing different arguments.


  • reverse:
The reverse method reverses the order of list of elements in an array.


In the preceding example, we have created an array used reverse method and displayed the result.


  • shift:
The shift method removes the first element from an array and returns the removed element. The combination of push() and shift() creates the method of queue.


In the preceding example, we have used shift method to remove the first element from an array.


  • slice:
The slice method selects part of an array and returns that selected part as a new array. The slice method takes one parameter which is the index of element to start slicing.


  • sort:
The sort method sorts the elements of an array. This method takes one parameter, which is a comparing function. If this function is not given, the array is sorted ascending.


In the preceding example, we have used sort method to sort the array elements in both ascending and descending order. In case of descending, If the return value is less than zero, the index of a is before b, and if it is greater than zero it's vice-versa. If the return value is zero, the element's index is equal.


  • splice:
The splice method adds or removes the elements of an array. The splice takes three parameters:


  • Index – The starting index.
  • Length – The number of elements to remove.
  • Values – The values to be inserted at the index position.


  • toString:
The toString method converts an array into a string and returns the string.


  • unshift:
The unshift method adds new elements to an array and returns the new length. The unshift element adds elment to the first position.


Length property of Array object
The length property holds the number of elements in an array. This property is used to determine the amount of items in an array.


Looping through an array

Following are the ways by which we can loop through an array.


Read XML file using jQuery in MVC3 Razor


In this article we will see how to read xml file using jQuery in MVC3 Razor.
We have explained two examples:
  • Creating table rows from XML nodes.
  • Populating dropdown using jQuery from XML.
We have used ASP.NET MVC 3 Razor as platform. 
We have added two xml files to the solution, one for each example. We have use jQuery's ajax method to get the file from the location. The nodes from the xml is read using jQuery.

 Create table nodes from XML nodes:

HTML
<table id="target" border="1">
<tr>
<th>ID</th>
<th>Name</th>
<th>City</th>
</tr>
</table>

<input type="button" value="Click" id="readXML" />
    
We have created a table element with headers defined for table and one button. On click of button the XML file is read and table td's are prepared and appended to the table.

jQuery
    <script type="text/javascript">
        $(document).ready(function () {
            $("#readXML").click(function () {
                $.ajax({
                    url: '../../Content/XML/Employee.xml',    // name of file with our data
                    dataType: 'xml',    // type of file we will be reading
                    success: parseXML,     // name of function to call when done reading file
                    error: loadfail     // name of function to call when failed to read
                });
            });
        });

        function parseXML(document) {
            $(document).find("Employee").each(function () {
                var tr = "<tr><td>" + $(this).find("Id").text() + "</td><td>" + $(this).find("Name").text() + "</td>" + "<td>" + $(this).find("City").text() + "</td></tr>";
                $("#target").append(tr);
            });
        function loadfail()
        {
        }
        }
</script>
    
We have used ajax post to read the XML file and then the XML file is read to create table data. On success of ajax post parseXML method is called which accepts the document parameter which is used to access the nodes of XML file.

XML

        <?xml version="1.0" encoding="utf-8" ?>
        <Employees>
          <Employee>
            <Id>1</Id>
            <Name>Cesc Fabregas</Name>
            <City>Barcelona</City>
          </Employee>
          <Employee>
            <Id>2</Id>
            <Name>Thierry Henry</Name>
            <City>Los Angeles</City>
          </Employee>
          <Employee>
            <Id>3</Id>
            <Name>Mesut Ozil</Name>
            <City>London</City>
          </Employee>
        </Employees>
    
We have used the above XML file.

Snapshots:

Before click
After click


Populating dropdown from XML:

HTML:

        <select id="target"></select>
        <input type="button" value="Click" id="readXML" />
    

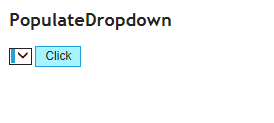
The HTML has a simple select element which renders empty dropdown list and a button, on click of this button we will read the xml and populate the dropdown list.

jQuery:

        <script type="text/javascript">
            $(document).ready(function () {
                $("#readXML").click(function () {
                    $.ajax({
                        url: '../../Content/XML/Dropdown.xml',    // name of file with our data
                        dataType: 'xml',    // type of file we will be reading
                        success: parseXML,     // name of function to call when done reading file
                        error: loadfail     // name of function to call when failed to read
                    });
                });
            });

            function parseXML(document) {
                $(document).find("player").each(function () {
                    var optionLabel = $(this).find('text').text();
                    var optionValue = $(this).find('value').text();
                    $("#target").append(
    '<option value="' + optionValue + '">' + optionLabel + '</option>'
     );
                });
            }

            function loadfail() {
            }
</script>
    

Using jQuery, on button click we read the xml file. We have used jQuery ajax post to read the xml file. The xml nodes are read on success of ajax post and read data is appended to the dropdown list.

XML:

        <?xml version="1.0" encoding="utf-8" ?>
        <Players>
          <player>
            <value>1</value>
            <text>Thierry Henry</text>
          </player>
          <player>
            <value>2</value>
            <text>Cesc Fabregas</text>
          </player>
          <player>
            <value>3</value>
            <text>Jack Wilshere</text>
          </player>
          <player>
            <value>4</value>
            <text>Mesut Ozil</text>
          </player>
          <player>
            <value>5</value>
            <text>Santi Cazorla</text>
          </player>
          <player>
            <value>6</value>
            <text>Tomas Rocisky</text>
          </player>
        </Players>
    

Snapshots:

Before click

After click


Image Navigation using simple cool navigator in MVC3 Razor

  • In this article we will see how to create a simple Image Navigator using jQuery, CSS and MVC3 Razor.
  • We often see great image navigators on many site. We have used 3 images and used simple jQuery to make it cool navigator. 
  • We have also used CSS3 efficiently to make it look better.
Approach:
We have 3 images on the page. We have used CSS to set their display to none. We have used jQuery ready function to show one out of three images. We have created a three circles out of span element using CSS3. Each circle is linked to the image. On click of the circle shape span, the linked image is rendered.

DEMO

View:

    @{
    ViewBag.Title = "ImageNavigatorFancy";
    Layout = "~/Views/Shared/_Layout.cshtml";
}

<style type="text/css">
.size
{
    width:1100px;
    margin-left:100px;
    height:600px;
    position:absolute;
    display:none;
}
.spanDiv
{
    position:absolute;
    margin-top:610px;
    margin-left:650px;
}
.spanClass
{
    background-color:Orange;
    height:12px;
    width:12px;
    display:block;
    position:absolute;
    cursor:pointer;
    border-radius:5px;
}

</style>
<div>
<img class="size" src="../../Content/Images/arsenal.jpg" alt="arsenal" id="arsenalImage" />
<img class="size" src="../../Content/Images/henry.jpg" alt="henry" id="henryImage" />
<img class="size" src="../../Content/Images/thierry.jpeg" alt="thierry" id="thierryImage" />
</div>
<div class="spanDiv">
<span class="spanClass" id="image1"></span>
<span class="spanClass" id="image2" style="margin-left:20px;"></span>
<span class="spanClass" id="image3" style="margin-left:40px;"></span>
</div>

<script type="text/javascript">
    $(document).ready(function () {
        debugger;
        $("#arsenalImage").show();
        $("#image1").css("background-color", "black");
        $(".spanClass").click(function () {
            var clickedSpanId = $(this).attr("id");
            if (clickedSpanId == "image1") {
                $("#arsenalImage").fadeIn("slow");
                $("#henryImage").fadeOut("slow");
                $("#thierryImage").fadeOut("slow");

                $("#image1").css("background-color", "black");
                $("#image2").css("background-color", "orange");
                $("#image3").css("background-color", "orange");
            }
            else if (clickedSpanId == "image2") {
                $("#henryImage").fadeIn("slow");
                $("#arsenalImage").fadeOut("slow");
                $("#thierryImage").fadeOut("slow");
                $("#image2").css("background-color", "black");
                $("#image1").css("background-color", "orange");
                $("#image3").css("background-color", "orange");
            }
            else if (clickedSpanId == "image3") {
                $("#thierryImage").fadeIn("slow");
                $("#arsenalImage").fadeOut("slow");
                $("#henryImage").fadeOut("slow");
                $("#image3").css("background-color", "black");
                $("#image1").css("background-color", "orange");
                $("#image2").css("background-color", "orange");
            }
        });
    });
</script>

In the above view we have three images with their display attribute set to none using CSS. On ready function we show first image. We have created three span element and gave then circular shape using CSS3. These circular spans are our navigators. On click of these spans the images are toggled.


Snapshots:


Image navigator using jquery in MVC3 Razor


  • In this article we will see how to develop a simple image navigator.
  • We have used jQuery, ajax, jSon and MVC3 Razor to accomplish this.
  • The best thing about this image navigator is that, the page do not postback for rendering next image.

Approach :

We are loading an image from database on first load of view. On click of next and previous we are quering database to get the next or previous image and rendring it on the UI. We are using jQuery, ajax and jSon to GET and update image which prevents postback of page.

View:
    @model RenderImage.ViewModel.ImageNavigatorViewModel

@{
    ViewBag.Title = "ImageNavigator";
    Layout = "~/Views/Shared/_Layout.cshtml";
}

<h2>ImageNavigator</h2>


<style type="text/css">
#imgDiv
{
    width:500px;
    height:500px;
    background-color:Orange;
    position:absolute;
}
#mainDiv
{
    margin-left:400px;
}
.absoluteClass
{
    position:absolute;
}
</style>

<div id="mainDiv">
<div id="imgDiv">
<img  style="height:inherit;width:inherit;" src="data:image/jpg;base64,@(Html.Raw(Convert.ToBase64String(Model.Image.ImageBytes)))" id="renderingImage" alt="players"/>
</div>
<div>
<input type="hidden" name="hiddenImageId" id="hiddenImageId" value="@Model.Image.ImageId" />
<input class="absoluteClass" title="Previous" style="margin-top:250px;" type="submit" id="previous" value="<" />
<input class="absoluteClass" title="Next" style="margin-left:474px;margin-top:250px;" type="submit" id="next" value=">" />
</div>
</div>

<script type="text/javascript">
    $(document).ready(function () {
        $(document).tooltip();
        $("#previous").click(function () {
            GetImage("previous");
        });
        $("#next").click(function () {
            GetImage("next");
        });
    });
    function GetImage(operation) {
        var ImageId = $("#hiddenImageId").val();
        $.ajax({
            url: '@Url.Action("GetNextPreviousImage", "ImageNavigator")',
            type: 'GET',
            data: { "operation": operation, "ImageId": ImageId },
            dataType: 'json',
            success: function (response) {
                if (response != undefined && response != "true") {
                    $("#renderingImage").attr("src", "data:image/jpg;base64," + response.result);
                    $("#hiddenImageId").val(response.imageId);
                }
            },
            error: function (error) {
                alert("Error" + error);
            }
        });
    }
</script>

The view accepts a View Model which carries the image bytes of load of the view. We have created a div element inside which we are rendering an image. We have created two buttons each for next and previous. On click of this button we use jQuery ajax method to get the next image from database. The bytes from database are then updated to the image source.

Controller :
    public ActionResult ImageNavigator()
        {
            ImageNavigatorViewModel model = new ImageNavigatorViewModel();
            RenderImage.Service.RenderImage service = new Service.RenderImage();
            model.Image = service.GetImageByImageId(2);
            return View(model);
        }

        [HttpGet]
        public JsonResult GetNextPreviousImage(string operation, int ImageId)
        {
            RenderImage.Service.RenderImage service = new Service.RenderImage();
            if(operation == "next")
                ImageId = ImageId + 1;
            else
                ImageId = ImageId - 1;
            byte[] imageBytes = service.GetImageBytesByImageId(ImageId);
            if (imageBytes == null)
                return Json("true", JsonRequestBehavior.AllowGet);
            else
                return Json(new { result = Convert.ToBase64String(imageBytes), imageId = ImageId }, JsonRequestBehavior.AllowGet);
        }

The first Action method renders the view. This action method also renders the first image. As you can see we have hard coded the imageId. Initially we are rendering any image from database, then we are rendering successive images on click of next and previous button.
The second JsonResult method is called on next and previous click, which gets the next or prevous image fro database and returns the bytes. The image bytes are converted to base 64 string format. If the database returns null for particular imageId then true is returned as jSon result instead of bytes. In this case nothing happens in success section of ajax post.

ViewModel :

We have used View Model for first load only. This is a class which is passed as model to the view. It looks like below :
    public class ImageNavigatorViewModel
    {
        public Image Image { get; set; }
    }

Service :
This is a class which interacts with database to get the images. It has two methods.
    public Image GetImageByImageId(int ImageId)
        {
            using (RenderImageEntities dataContext = new RenderImageEntities())
            {
                return dataContext.Image.Where(query => query.ImageId == ImageId).SingleOrDefault();
            }
        }

        public byte[] GetImageBytesByImageId(int ImageId)
        {
            Image image = null;
            using (RenderImageEntities dataContext = new RenderImageEntities())
            {
                image = dataContext.Image.Where(query => query.ImageId == ImageId).SingleOrDefault();
            }
            if (image != null)
                return image.ImageBytes;
            else
                return null;
        }

The first method returns the Image using ImageId and second method returns the image bytes.

jQuery Tooltip :

We have also used jQuery tooltip for better UI effects. In order to use tooltip you need to include following referenced js files in application and also need to refer in Layout file.
    <!DOCTYPE html>
<html>
<head>
    <meta charset="utf-8" />
    <title>@ViewBag.Title</title>
    <link href="@Url.Content("~/Content/Site.css")" rel="stylesheet" type="text/css" />
    <link href="@Url.Content("~/Content/jquery.ui.all.css")" rel="stylesheet" type="text/css" />
    <script src="@Url.Content("~/Scripts/jquery-1.5.1.min.js")" type="text/javascript"></script>
    <script src="@Url.Content("~/Scripts/modernizr-1.7.min.js")" type="text/javascript"></script>
    <script src="@Url.Content("~/Scripts/jquery-1.8.3.js")" type="text/javascript"></script>
    <script src="@Url.Content("~/Scripts/jquery.ui.core.js")" type="text/javascript"></script>
    <script src="@Url.Content("~/Scripts/jquery.ui.widget.js")" type="text/javascript"></script>
    <script src="@Url.Content("~/Scripts/jquery.ui.position.js")" type="text/javascript"></script>
    <script src="@Url.Content("~/Scripts/jquery.ui.tooltip.js")" type="text/javascript"></script>
    <script src="@Url.Content("~/Scripts/jquery.ui.effect.js")" type="text/javascript"></script>
    <script src="@Url.Content("~/Scripts/jquery.ui.effect-explode.js")" type="text/javascript"></script>
</head>

<body>
    @RenderBody()
</body>
</html>

The above is the Layout file which is finally referred in View.

Database:


We need to have a simple database for this code to test. We need a table consisting of image bytes.  We have following table in database.


Snapshots:


Prevent cut, copy paste on textbox using jQuery


  • In our development process, we come across many interesting and starnge scenarios.
  • On of them is not allow user to copy, or cut text from textbox and paste into the same.
  • This scenario can be achieved easily using jQuery.
  • We need to bind the copy, cut and paste methods to textbox which are provided by jQuery and stop or prevent the default action.

Watch Live Demo

Code :
$(document).ready(function () {
    $("#start").live("cut copy paste", function (e) {
        e.preventDefault();
        alert("The operation '" + e.type + "' is not allowed !");
    });
});

Demo :


In the above example, we are binding the cut, copy and paste functions to the textbox and preventing the default behaviour. When user tries these operations, the default behaviour is prevented.

We can also use the bind method in place of live method.


Code :

$(document).ready(function () {
    $("#start").bind("cut copy paste", function (e) {
        return false;
    });
});

Demo :


In the above example, we have used bind method, and used return false to prevent cut, copy and paste operations.


Thus jQuery makes it pretty easy to disable cut copy and paste operations on a textbox.


Disable right click using jQuery


  • Often in our development we require to disable right click on page or on some part of the page.
  • The some part could be a control or section of a page. 
  • We can achieve this simply using jQuery.

Watch Live Demo

Disabling righ click on page :

Code :

$(document).ready(function()
                  {
                      $(document).bind("contextmenu",function(e)
                                       {
                                           e.preventDefault();
                                       });
                  });

Demo :


In the above example, we are preventing the context menu to appear on right click by using the preventDefault.
We can also do the same by returning false as shown below :

Code :

$(document).ready(function()
                  {
                      $(document).bind("contextmenu",function()
                                       {
                                           return false;
                                       });
                  });

Demo :

Thus we have disabled the right click using return false trick.


Disabling right click on control :


Code :

$(document).ready(function () {
    $("#disabled").bind("contextmenu", function () {
        return false;
    });
});

Demo :


In the above code, we have disabled the right click on button control. Thus we can disable the context menu on particluar control as well along with entire page.

Detecting browser using jQuery


  1. We often need to know the current running browser and its version while developing applications. 
  2. The jquery makes it easy to determine the browser infomation like browser used and its version.
  3. We use $.browser property to determine the browser details.
  4. It contains flags for each of the four most prevalent browser classes (Internet Explorer, Mozilla, Webkit, and Opera) as well as version information.

Code :

$(document).ready(function () {
    $("#browser").click(function () {
        if ($.browser.mozilla) {
            alert('Current Browser : Mozilla, Version : ' + $.browser.version);
        }

        if ($.browser.safari) {
            alert('Current Browser : Safari, Version : ' + $.browser.version);
        }

        if ($.browser.chrome) {
            alert('Current Browser : Chrome, Version : ' + $.browser.version);
        }

        if ($.browser.opera) {
            alert('Current Browser : Opera, Version : ' + $.browser.version);
        }

        if ($.browser.msie) {
                        alert('Current Browser : IE, Version : ' + $.browser.version);
        }
    });
});

Demo :


The $.browser makes use of navigator.userAgent to determine the platform.
As $.browser uses navigator.userAgent to determine the platform, it is vulnerable to spoofing by the user or misrepresentation by the browser itself. It is always best to avoid browser-specific code entirely where possible. The $.support property is available for detection of support for particular features rather than relying on $.browser.
Thus using the above jQuery code we can determine the current running browser and its version.

Tips for optimizing jQuery Selection


  • jQuery provides wide range of selectors to use and explore.
  • Using these selectors we can select DOM elements and can traverse and manipulate then using jQuery methods.
  • In this article we will see how to use jQuery selectors efficiently that also helps gaining optimization.
Following are the points to remember :

Use Id selector :

Always try to use ID selector while selecting a single element. The ID attribute is always unique on page, so browser finds it easy to select an element using ID slector.

eg :

$("#id").hide();

The "#" symbol signifies that we are using id selector.


Avoid class selector alone :

Lets have a scenario. Suppose you have number of DIV elements on page with particluar class applied to it. You can select these div elements using class selector in below two ways.

eg 1:

$(".redDivs").hide();

eg 2: Efficient way

$("div.redDivs").hide();

For first example, the browser will search all the elements on the page. For second example, the browser will select all the div elements and then filters it using the class selector.
        So when you know which element to select with particular class, always use combination of element and class selector.

Demo :


Be Specific and Simple :

Write the simple and specific selector query. Always try to query the element you want to select instead of quering their parents to reach thier target child.

eg 1:

$("body #myDiv #myP em ").css("color","red");

eg 2: Efficient way

$("#myP em").css("color","red"); 

eg 3: Another more efficient way

$("#myP").find(em).css("color","red");

Demo :


Increase Specificity from left to right :

Be specific while using selectors. Always use selector combination which searched less for elements. Consider the below example :

eg :

$("#myP em").css("color","red");

In above example, all em elements on page are selected and loaded to stack and then the selected elements are filtered based on "#myP". So instead, you can select all "#myP" element first and then search for em elements inside that. The above query will be less efficient when page has many em elements.
         The following query is much better and more efficient.

eg :

$("#myP").find(em).css("color","red");

or 

$("em", $("#myP")).css("color","red");


Avoid repetition and Utilize chaining

Lets have a scenario where you want to perform multiple operations on selected div element. 
In such cases do not select div element number of times equal to operations need to perfom.
Instead use chaining feature of jquery which allows to perform consecutive operations on set of selected elements one after another.

eg : Wrong way

$("#myDiv").css("height","100px");
$("#myDiv").delay("2000");
$("#myDiv").slideUp("slow");

eg : Efficient way

$("#myDiv").css("height","100px").delay(2000).slideUp("slow");

Thus the chaining helps in optimizing the selection process

Demo :


Thus following above steps we can achieve efficient selector usage and optimization.

jQuery document ready handler with example

      jQuery supports Unobtrusive javascript, i.e. structure or DOM is separated from script or behaviour. When using Unobtrusive javascript, behaviour is separated from structure.
So we are performing operations on the page elements outside of the document markup that created them.
In order to achieve this, we need to wait until the DOM elements of the page are fully realized before those operations execute. In short the HTML should load before jquery works.
Traditionaly, the onload handler for the window instance is used for this purpose.

eg :

window.onload = function()
{
//Write something here !1
};

This causes the defined code to execute after the document has fully loaded. Unfortunately, the browser not only delays executing the onload code until after the DOM tree is created, but also waits until after all external resources all fully loaded and the page is displayed.
                 This includes not only images, but Quicktime and flash videos embedded in web page and much more. As a result, visitors can experience a serious delay between the time that they first see the page and the time that the onload script is executed.

Better Approach :
       A much better approach would be to wait only untill the document structure is fully parsed and the browser has converted the HTML into its resulting DOM tree before executing the script to apply the rich behaviour. To achieve this in a cross-browser manner is difficult, but jquery comes to rescue. jQuery provides a simple means to trigger the code or script once the DOM tree as loaded. Following is the syntax : 

$(document).ready(function()
{
   $("#largeDiv").hide();
});

We wrap the document instance with the jQuery function, and then we used ready method, passing a function to be executed when the document is ready for manipulation. 
             We can also use a shorthand form for above syntax :

jQuery(function()
{
   $("#largeDiv").hide();
});

     By passing a function to jquery() or $(), we instruct browser to wait untill the DOM has fully loaded before executing the code. We can use this technique multiple times within the same HTML document, and browser will execute all of the functions we specify in the order that they are declared in the page.


Demo :


Apply style to alternate tr of table using CSS and jQuery


  • In this article we will see how to apply style to alternate tr of a table.
  • We can achieve this using either CSS of by jQuery.


Using CSS :

CSS provides a pseudo selector which selects alternate tr of table and applies specified properties.


:nth-child() is the selector which works for us. 


This selector is not supported in all browser.


Example :


<html>
<head>
<style type="text/css"">
tr:nth-child(even)
{
color:red;
}
tr:nth-child(odd)
{
color:green;
}
</style>
</head>
<body>
<table border="1">
    <tr><td>jQuery</td><td>Amazing</td></tr>
    <tr><td>CSS</td><td>Beautiful</td></tr>
    <tr><td>MVC3</td><td>Creative</td></tr>
    <tr><td>CSS3</td><td>Wonderful</td></tr>
</table>
</body>
</html>

Demo :


In the above example, we have created a table element. We have used :nth-child(even) selector to select all the even tr of table and applied css to it. We have done same thing for odd tr's.


Using jQuery :


We can also use jQuery to apply style to alternate tr's of the table. In jQuery we have even and odd selector to select the respective tr's of table. We will define CSS classes which we will add using addClass() method.


Example :


<html>
<head>
<style type="text/css"">
.evenTR
{
    color:Red;
}
.oddTR
{
    color:Green;
}
</style>
<script type="text/javascript" src="http://ajax.googleapis.com/ajax/libs/jquery/1.6.2/jquery.min.js"> 
</script>
<script type="text/javascript">
    $(document).ready(function () {
        $("tr:even").addClass("evenTR");
        $("tr:odd").addClass("oddTR");
    });
</script>
</head>
<body>
<table border="1">
    <tr><td>jQuery</td><td>Amazing</td></tr>
    <tr><td>CSS</td><td>Beautiful</td></tr>
    <tr><td>MVC3</td><td>Creative</td></tr>
    <tr><td>CSS3</td><td>Wonderful</td></tr>
</table>
</body>
</html>

Demo :


In the above demo we have achieved same what we achieved using CSS. In the above example, we have created two CSS classes one for all odd tr's and one for all even tr's. On document ready we selected the even tr's using even selector in jQuery and applied CSS by adding the CSS class using addClass() method.


So, we could achieve the alternate tr styling using both CSS and jQuery.

jQuery Interview Questions with answers and demo - Animation


Q :- How to hide elements in jQuery ?
Ans : We can use hide() method to hide elements in jQuery. 

Demo 

Q :- What show method does in jQuery ?
Ans : show() method makes the elements visible from hidden state with an animation effect.

Demo


Q :- What parameters can we pass to show or hide method in jQuery ?

Ans : Both the method accepts duration in milliseconds. 
       eg: $("div").hide(600);
       We can also pass the string value i.e. slow or fast.
       slow and fast string indicates 600 and 200 milliseconds respectively.  

Q :- What is the use of animate method in jQuery ?

Ans : animate() method performs a custom animation of a set of CSS properties.
      The animate() method allows us to create animation effects on any numeric CSS property.
      eg : $("#targetDiv").animate({
                opacity: 0.4,
                marginLeft: "0.6in",
                fontSize: "3em",
                borderWidth: "10px"

            }, 1500);

Demo


Q :- How to achieve sliding effects in jQuery ?

Ans :jQuery has method to provide sliding effect. slideUp(), slideDown() and slideToggle().

Q :- How slideUp() method works in jQuery ?

Ans : SlideUp() method animates the height but causes the lower parts of page to move up.
      This method also accepts duration parameter. We can supply either the string parameters slow or fast or we can specify the duration in miliseconds
       
      eg : $(this).find("ul").slideUp("slow");

Demo


Q :- How slideDown() method works in jQuery ?

Ans : SlideDown() method also animates the height but causes the lower parts of page to move down.
      This method also accepts duration parameter. We can supply either the string parameters slow or fast or we can specify the duration in miliseconds
       
      eg : $(this).find("ul").slideDown("slow");

Demo


Q :-  What is defference between hide() method and display:none css property ?

Ans : Both methods performs the same task, but hide() method adds animation effect while hidding the elements.

jQuery Interview Questions with answers and demo - Selectors


Q :- How to use ID selector with jQuery ?
Ans : $("#id").css('color','red');

Demo 


Q :- How to use class selector with jQuery ?

Ans : $(".class").css('color','red');

Demo


Q :- How to use element selector with jQuery ?

Ans : $("p").css('color','red');

Demo


Q :- How to select elements with two classes ?

Ans :- $(".class1.class2").css('color','red');


Q :- How to select all anchor tags having href attribute ?

Ans :- We can use attribute selector of jQuery.

   $("[href]").css('color','red');


Demo


Q :- How to select anchor tag with href attribute value set to Word.html ?

Ans : We can use Attribute Value selector. This selector selects the elements on page with specified attribute value.

    $("[href = 'world.html']").css('color','red');


Demo


Q :- How to select all paragraph elements having text 'hello' in it ?

Ans : We can use element selector to select all the paragraph elements ans the can use contains selector to filter paragraph elements with specified text.

 $("p:contains('hello')").css('color','red')


Demo


Q :- How to select checked checkboxes from the page ?

Ans : $(":checked")

Demo


Q :- How to select third li element from the list of 10 li elements ?

Ans : We can use equal selector. 
      $("ul li:eq(2)").css('color','red')
      The index start from 0.

Demo 


Q :- How to select even tr's of table ?

Ans : $("tr:even").css('color','red')
      or for selecting even paragraph elements we can use : 
      $("tr:even").css('color','red')

Demo


Q :- How to select odd tr's of table ?

Ans : $("tr:odd").css('color','red')
      or for selecting odd paragraph elements we can use : 
      $("tr:odd").css('color','red')

Demo


Q :- How to select first paragraph element on the page ?

Ans : $('p:first').css('color','red')

Demo


Q :- How to select last div element on the page ?

Ans : $('div:last').css('color','red')

Demo


Q :- How to select all li elements with position or index greater than 2 ?

Ans : $("ul li:gt(2)").css('color','red')

Demo 


Q :- How to select all li elements with position or index less than 2 ?

Ans : $("ul li:lt(2)").css('color','red')

Demo


Q :- How to select all p elements on page except first ?

Ans : $("p :not(:first)").css('color','red')

Demo


jQuery Interview Questions with answers


Q :- What is jQuery ?
Ans : jQuery is a lighweight library that emphasizes interaction between Javascript and HTML.

Q :- Is jQuery a library for client scripting or server scripting ?
Ans : Client Scripting.

Q :- Is jQuery a W3C standard ?
Ans : No.

Q :- Which sign does jQuery use as a shortcut for jQuery ?
Ans : $

eg: $("#div").css('color','red');

Q :- When and who founded jQuery ?
Ans : jQuery was founded by John Resig in January 2006.

Q :- What scripting language is jQuery written in ?
Ans : Javascript.

Q :- What are jQuery Selectors ?
Ans : Selectors are used in jQuery to find and select DOM elements via id, class or element selector. There are many new selectors introduces in jQuery. Using jQuery selectors DOM elements can be selected and manipulated.

Q :- What does $("div") will select ?
Ans : This will select all the div elements on page.

Q :- What are the fastest selectors in jQuery ?
Ans : ID and element selectors are the fastest selectors in jQuery.

Q :- What are the slow selectors in jQuery ?
Ans : class selectors are the slow compare to ID and element.

Q :- How can you select all elements  in page using jQuery ?
Ans : We can use all selector to select all elements on page.

eg : $('*')

Q :- How to select element having a particular class (".selected") ?
Ans : $('.selected')

Q :- How to set page title using jQuery ?
Ans : 
$(functio()
{
$(document).attr('title','20fingers2Brains');
});

Q :- Is it possible to use jQuery together with AJAX?
Ans : Yes.

Q :- What is the name of jQuery method for an asynchronous HTTP request ?
Ans : jQuery.ajax()

Q :- What are the features of jQuery in short ?
Ans : Effects and Animations, Ajax, Extensibility.

Q :- Name the method use to hide selected elements on UI ?
Ans : .hide().

Q :- What is chaining in jQuery ?
Ans : Chaining means to connect multiple functions and events in selectors.

eg :
$("td").first().css('color','Red');

Q :- What is difference between remove and detach method ?
And : detach method is same as remove method , but detach keeps the jQuery data associated with the removed elements.
Detach method id more powerful when you have ti reinsert the removed data.

Q :- What is use of jQuery load() method ?
Ans : The jQuery load() method is powerful AJAX method.
The load() method loads data from a server and puts the returned data into the selected element without reload the complete page.

Q :- What does size method of jQuery returns ?
Ans : It returns the number of elements in the object. This method helps in finding the count of elements in the object.

Q :- How to debug jQuery ?
Ans : Add the keyword debugger to the line from where we want to start the debugging.
$(functio()
{
debugger;
$(document).attr('title','20fingers2Brains');
});

Q :- What is difference between document.Ready() and onload() ?
Ans : document.ready() function can be inlcuded multiple times whereas onload() method can be called only once in a page.
document.ready() is called as soon as DOM is loaded while onload is called when everything is loaded on page i.e. images, DOM and other resources associated with the page.

Q :- What is jQuery UI ?
Ans : jQuery UI is a library which is built on top of jQuery library. jQuery UI comes with cool widgets, effects and interaction mechanism.

Q :- What are the advantages of using jQuery over Javascript in Asp.net Web Application.
Ans : jQuery is concise javascript code. Minimal amount of code is to be written for the same functionality
than the javascript.

Q :- Can we use our own specific charactor in the place of $ sign in jQuery?
Ans : You can create your own shortcut very easily. The noConflict() method returns a reference to jQuery, that you can save in a variable, for later use.

Q :- What is the difference between .js and .min.js ?
Ans : .min.js is basically the minified version of .js file. Both the files are same as far as functionality is concerned.
.min.js is used to increase the page performance as it is small in size compare to .js and takes less time to load.

Q :- What is the advantage of using minified version of jQuery rather than using the conventional one ??
Ans : The advantage of using a minified version of jQuery file is efficiency. The efficiency of page increases as minified version is small in size and takes less time to load.